Planning a Kilimanjaro Trek

My trek up Kilimanjaro may be quite a few weeks away yet but there’s plenty to organise and plan and therefore plenty to write about here. Part of the excitement is in the planning and preparation, so it’s time to start telling you about it and recording these things for posterity. From the trip itself to flights, visas, insurance, airport parking, equipment, gadgets and clothing, I need to make sure everything is in place and ready to go. There are immunisations and malaria medications to sort out, itineraries to make, documents to print and kit to buy. So much to do, but it’s all part of the fun and all adds to the anticipation of what should be a trip of a lifetime.
This blog post will run through some of my thought processes and choices whilst getting ready for the trip. Most were made after much research and reading of books, blogs, travel websites and YouTube videos. Hopefully the following article will help you with your planning of a Kilimanjaro trek. You won’t want to follow it exactly as you will have your own specific requirements but hopefully it’ll give you things to think about and some helpful ideas. As well as the planning process, it’ll include a packing list, kit list and ideas on preparing for a Kilimanjaro Climb. No doubt I’ll write plenty about the trip itself, probably with a day by day account once it has been done, so I’ll tag any posts related to Kilimanjaro in the same way so that you’ll be able to find them all here: Kilimanjaro Articles
If you have any recommendations, tips, tricks or ideas then please do comment. I may be a fairly experienced hill-walker and something of a kit junkie, I have the fitness and expertise for such an adventure but I’m obviously no expert on climbing Kilimanjaro so any advice will help me as well as others reading this article
Booking The Trek
It’s illegal to trek Kilimanjaro on your own these days, you have to do it with a certified guide and have to pay park entrance fees for every day that you are in the Kilimanjaro National Park. There are of course lots of companies offering guided treks, and as with most things in life the quality of these can vary. These providers don’t just organise a suitable guide for you, but they come with a complete entourage of porters, cooks, toilet porters and safety crew. The basic expectations from such a guided group trek seems to be a head guide and an assistant guide along with enough porters to carry all of your kit and the shared kit up the mountain. They also provide tents, mess tents for evening meals and breakfast, provide all of your food and do all of the cooking and cleaning for you. Although on the face of it almost all of the companies I looked at advertise similar offerings, some are better than others. Not all provide a private toilet, guide to trekker ratios vary and I imagine the quality of the food, equipment and client care varies too.
The first consideration however when choosing such a company is to make sure they are signed up to and onboard with Kilimanjaro Porters Assistance Project (KPAP) to ensure the porters are treated well. The next is the quality of their guides, the equipment they provide, and any other aspects that you particularly want from your trek. It is possible to just turn up and book onto a trek once in Tanzania but I wanted to make sure everything was booked way in advance and wanted to go with a company that had a UK presence too. I used Much Better Adventures for my recent Mount Toubkal trip (Use this code for a discount when booking: ALANC6099).
I chose them at the time because they were one of the few companies to offer a Northern Circuit trek up Kilimanjaro so the Mount Toubkal trip was an opportunity to try them out. [Note: At the time of writing Much Better Adventures don’t seem to be offering a Northern Circuit option on Kilimanjaro now.] As it happens, you don’t really have much contact with Much Better Adventures themselves once the booking is completed as everything is handed over to the local operators. That said, they do appear to be a highly ethical company that use quality operators in the destination country and everything ran smoothly in Morocco. In essence they passed my tests in Morocco so I was planning to use them for my Kilimanjaro trip as well! Skyhook Adventures offer quite a few options as well.
They might not be the cheapest option out there (at around £1800 for the route I’ve chosen) but they seemed to tick all of the boxes I wanted ticked and do appear to be doing things properly with the best interests of everyone involved. Note that if you choose a trekking company solely on price much of the money will be going towards park fees so there will be little left for porters wages, equipment, food and such like. To a certain extent you do get what you pay for. It sounds like a lot of money (and it is to me) but when you consider the number of porters involved, the logistics that need to be organised and the fact that they’ll be providing food and shelter for me whilst on the mountain, it’s not really too bad. The park fees alone are over £600 and that’s included in the price, as are airport transfers and a couple of nights in a hotel before and after the trek.
The Route
As mentioned above I had decided that I wanted to do the Northern Circuit route which is the longest of the routes. It loops around the northern side of the mountain before joining the more commonly used routes for the final push to the summit. This route is longer giving you more time to acclimatise to the altitude and also quieter than the other routes. It is however more expensive simply because it takes more days so you and your team are in the park for longer.
However, having coped OK with the altitude on Mount Toubkal I decided that the more scenic, shorter and therefore less expensive Machame Route might be a suitable option. It would mean less time off work too and did give me more options with respects to providers. I decided to stick with Much Better Adventures due to the reasons stated above and also because they do the 7 day Machame Route rather than the 6 day Machame route which would give me an extra acclimatisation day at around 4,000m. It’s still not as long as the Northern Circuit but has a higher success rate than that of the shorter option. There are plenty of other routes to choose from, but for me the Machame route seemed like a good compromise. It may be one of the busier routes but hopefully for good reason.
Once booked my expectations of Much Better Adventures were confirmed with regards to them using reputable local companies. The trek would be fulfilled by Trek2Kili and reviews for them were as good as they could get. Online reviews were perfect, as was the review in Henry Stedman’s guidebook.
The other things that steered me towards the Much Better Adventures trek was that they provide a private toilet for the group which some companies don’t and offer single supplements so that I could pay a little extra to have a tent to myself. (Worth the extra cost I think for a little bit of privacy now and then). They also use one of the better hotels in Moshi for the pre and post trek nights. The equipment that Trek2Kili provide is top notch as well: Mountain Hardwear Trango 3 tents and Mountain Hardwear Lamina -30F sleeping bags.
With my route picked and a trek booked it was time to look into flights.
Flights
I booked these through Opodo, booking onto Emirates flights. I decided to pay a little extra so that I could fly from Manchester rather than Gatwick so as to save a few hours of driving at either end. The difference in price will be offset not only by the convenience but also in diesel savings so overall it’ll work out cheaper. Timings of the flights were ideal, leaving the UK at around 9am and getting into Tanzania (via Dubai) at around 4am the following morning. This would give me a whole day in Moshi before the trek on Kilimanjaro actually starts and hopefully a full nights sleep as well (That’s very hopeful though if you know me as I don’t sleep well at the best of times). Similarly the return flight doesn’t leave Tanzania until around 11pm giving me another full day to relax in Moshi after the trek. It then gets me back into Manchester in the middle of the afternoon the following day meaning I don’t have to drive through the night.
There were no frills as far as the flights were concerned though, I haven’t even booked a window seat as I can’t justify the extra expense so will no doubt end up squashed into the middle seat for hours on end. A shame, as I like watching the world go by (literally) from a window seat, but I can’t afford everything and have to make some compromises here and there.
Insurance
I had a little look around and BigCat seemed to offer the best value and had nice easy to use website too with a page dedicated to Kilimanjaro travel insurance. Their Extreme Activity Pack covers treks over 4500m which is fine for Kilimanjaro. As always though you have to comb through the policy details to make sure everything you might need is covered. Another company that were recommended was World Nomads.
Visa
Don’t forget that you’ll need a Visa. You can get one on arrival at Kilimanjaro Airport, but I like to have things organised so I applied online for mine via the Tanzanian Governments’ Immigration website. It took about 48 hours to be processed. Easy peasy, and another $50 spent.
Immunisations
I’d already had these for my trip to Morocco so hopefully I should be pretty well covered there, but I’m checking with the doctors just in case and need to ask about malaria medications as well. The list of immunisations you actually need to travel to Tanzania are listed here. The only thing I’m not sure about is whether or not I should have the immunisation for Yellow Fever. It isn’t a requirement of entry into Tanzania unless you are coming from or travelling through a Yellow Fever area on the way there. However, there is a small risk of contracting Yellow Fever from mosquito bites whilst in Tanzania so maybe I should have it as a precaution anyway. Not that there are any mosquito’s once I’m above about 1500m.
Equipment
Thankfully I didn’t have a huge amount to buy here as I have quite a bit of ‘technical’ clothing as it is. Here’s what I’ll be taking / using.
Rucksack
I went into this in detail before my Mount Toubkal trip when I bought a new Montane Trailblazer rucksack that would cater both for the Morocco trip and my planned Kilimanjaro trip. The rucksack may have been overkill for Mount Toubkal but it will be perfect for Kilimanjaro. 35 litres with plenty of technical features and most importantly, super comfy. I love it!
Duffle Bag
As well as the rucksack I’ll need a duffle bag that will have all of my other belongings in it. This will be carried by the porters so I’ll aim to keep it as light as possible so as to save their backs. I didn’t have a suitable bag for this and the really nice ones are also really expensive so I went for an inexpensive (£30) Eurohike bag. It has a 90l capacity, is made from water-resistant heavy duty material and should serve it’s purpose. It has a couple of compression straps, a decent zip and also some rucksack style straps which will make carting it around airports a little easier. I’ll pack everything into individual dry-bags inside of it as it won’t be fully waterproof. As far as dry-bags go I shall have a selection of them in all different sizes.
Clothing
As to what I’ll be wearing and taking with me in these bags, I’ll start with the clothes and start at the bottom. The thing with Kilimanjaro is that you need to be prepared for all eventualities. Temperatures at the base can be around 30°C so shorts and thin ‘T’-shirts will be the order of the day. Summit temperatures can be in the minus 20’s with strong winds, snow and ice. Down jackets, waterproofs, base layers, mid layers, hats, gloves etc will be needed there.
Boots
I did have two pairs of boots, an expensive, very sturdy pair of Kayland boots and a much cheaper, less sturdy pair of Karrimor boots that I bought to wear up Mount Toubkal. I was planning on taking the cheaper Karrimor ones for Kilimanjaro as they are a little lighter, much more flexible and therefore more comfortable for long days. They also feel slightly less ‘clumpy’, which I prefer. However, I discovered on a recent walk in the Welsh hills that they are far from waterproof (despite the fact that they were sold as being waterproof and have ‘waterproof’ written all over them). They aren’t! I was therefore back to square one on the boot front and decided to buy a new pair. I wanted something of similar weight and sturdiness as the Karrimor boots but that were waterproof and equally as comfortable. That seemed like too much to ask. I found plenty that seemed perfect. The Scarpa and Salomon ones in particular seemed to fit the bill but they just didn’t fit my feet. In the end I went with a relatively cheap pair of Berghaus leather boots but the jury is still out on whether or not they’ll prove comfortable.
The important points to look for are comfort, waterproofing, support and durability. Comfort is by far the most important and you will need to have tried them out beforehand. A couple of long 4 hour plus walks should be enough to make sure they are suitably high on the comfort scale, but the more you can wear them before your Kilimanjaro trek the better. Some boots take a lot longer to break in than others do.
Shoes
If my Berghaus boots prove to be the perfect pair of boots then I’ll also take a pair of trail running shoes. These will be for wearing in and around camp, I might wear them on warmer, easier days of the trek as well, and they will be a backup in case something catastrophic happens to my boots (I haven’t spent a fortune on the boots afterall). If I’m still in two minds about the Berghaus boots then I might take them along with the non-waterproof but comfortable Karrimor boots rather than the trail shoes. At least then I’ll have a spare pair that I know are comfortable. I might also take a very light pair of ‘dude shoes’ or flip-flops too, even if only for the hotel in Moshi.
Socks
I’ll have 4 or 5 pairs of hiking socks. I like the standard Bridgedale ones, but I might get some of their merino wool ones as well. I know they are comfortable and as long as they stay dry I can wear each pair for more than a single day. Some people like to wear thin liner socks as well to prevent blisters and for extra warmth. As with the boots you’ll want to test this beforehand to see what suits you best. I’ve never tried it, but I might give it a go as it might keep my feet warmer as well. Warm feet are happy feet, an I’ll want happy feet for summit night.
Gaitors
I don’t usually wear gaitors, but I shall take some with me as they are useful for stopping small stones from scree slopes getting into your boots and the same for snow if there is lots of it on summit night. I bought a relatively cheap pair of gaitors as I’m not sure how much I’ll use them.
Leg-wear
I’ve got a cheap but comfortable pair of very thin Regatta walking trousers. I’m hoping to get another pair of these as they are so lightweight that a spare pair won’t go amiss and won’t add much to my luggage either. I’ll have a slightly thicker pair as well. I’ll have a couple of pairs of lightweight shorts too and I’ll also take a pair of running tights which can be worn under the trousers as an extra layer once at altitude where temperatures will drop. I will take a pair of fleece trousers as well. Sitting around in camp at night could be quite chilly so fleece trousers under my trekking trousers should keep me a little cosier.
Underwear
Merino wool boxers all the way here. Comfortable, soft, non-chaffing, wicking, quick drying and odour resistant. They might be a little more expensive than cheap boxers from Matalan, but I do keep my crown jewels in them so it’s worth the expense! Full length thermal long-johns are often recommended as well. I don’t think I’ll bother with these if I have some fleece trousers though.
Base Layers
I’ll take 2 or 3 thin long-sleeved base layers with me along with a couple of light ‘T’-shirts. The base layers will likely be merino wool for the usual, wicking, odour resistant qualities, although that said, synthetic versions do dry a little quicker in my experience. and I already have some synthetic ones so I’ll probably just use those.
Mid Layers
I’ve got a nice quilted Kilpi mid layer from SportPursuit that I will take, along with at least one other fleece.
Down Jacket
I have a few jackets to choose from. The warmest of which is a VERY old 800+ fill goose down Sprayway jacket, but it doesn’t have a hood. I’ve also got an old and slightly worn out Montane jacket, and a newer Kilpi down jacket. The Montane one is thicker, longer and probably the better jacket but it is quite worn. The Kilpi is a little thinner so not as warm. I think I’ll take the Montane for the extra warmth – unless of course I buy another one to add to my collection (you can never have too many down jackets!). A down jacket isn’t essential if you have enough other layers but they are incredibly warm for their weight and a joy to wear.
Waterproofs
As far as my waterproofs go I have a new Ffern eVent jacket that was bought specifically for just such an adventure from SportPursuit. It is the Orkan Waterproof shell jacket which at £130 was a bargain! The fact that it’s fairly new should mean that it will perform well even in the wettest of conditions. It was tested recently in about the wettest weather that the Brecon Beacons could throw at it and it worked well. This will be accompanied by a pair of Mountain Warehouse waterproof over trousers which are quite heavy duty and again work fairly well.
Extremities
For my hands I’ll have a pair of thin, running gloves from Karrimor, along with a thicker pair of waterproof Sealskin gloves. The thin ones can act as liners if it’s really cold or can be worn on their own at lower altitudes. For my head I’ll have a thin running style skull-cap and maybe my nice bright green fluffy bobble hat that I got from the Kitzbuhel Triathlon. I’ll also take a baseball cap or wide brimmed hat to act as a sun shade when I don’t need the extra warmth.
Accessories
I’ve already mentioned the gaitors, but I will also take a few buffs with me. These are good for a number of uses, as scarves, hats, bandanas and I use them as sweat-bands as well as insulators. I’ve got a nice long one with a fleecy section as well which I will take in lieu of a balaclava.
That just about does it for the clothes.
Sleeping
I shall be hiring a sleeping bag from the trekking company. A suitable one is just too expensive and would be far too warm for the use I would get out of it elsewhere. I will however take my Rab silk sleeping bag liner as it weighs next to nothing and means I’ll not only have an extra (albeit thin) layer of insulation but I’ll have a bit of a barrier between me and a sleeping bag that other people have slept in!
Gadgets
You know me, I love a good gadget or two and the modern traveller can’t afford to be without them. There is of course a balance to be struck between weight and convenience and sometimes having too many gadgets is just a distraction. There are some things I’ll just have to take though. My phone will be accompanying me and can do so much these days. Once on the mountain I imagine it will be used mainly as a camera or a book reader though. I’ll have it in airplane mode to preserve the battery as I don’t expect to have any reception anyway.
I’m not sure that the camera on my phone will quite cut it. Not for an adventure of this magnitude. My DSLR camera is too much to carry so I’m in the market for a new compact, superzoom camera. So far the Sony Cyber-SHOT DSC-HX90V looks to be a good option so I’ll take a closer look at it next time I’m near a suitable shop. It has a massive zoom, a fairly decent lens, good reviews and GPS tagging built in, all in a nice small, easy to use package.
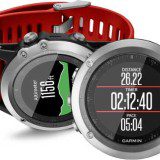
My trusty Garmin Fenix 3 GPS watch will be on my wrist so as to record the GPS track of my trek each day.
The guides will carry pulse oximeters to check our blood oxygen saturation every day, but I might just take my own as well.
Other than that I won’t be taking any other gadgets, except of course all of the cables and chargers needed for the ones above. There won’t be any electricity on the mountain though so I will take my solar panel battery pack. The plan will be to hang this on my rucksack during the day so as to charge the battery pack and then use the battery pack to charge my phone, watch or camera overnight. I’ll take spare batteries and spare memory cards for the camera as well.
Toiletries, Hygiene and Health
Nothing unusual here, just all of the essentials packed into my LifeVenture toiletries bag:
Toothpaste, toothbrush, soap, razor, wet wipes, roll-on deodorant, sun screen, insect repellent, High UV chapstick, anti-bacterial hand gel, nail brush and toenail clippers. Also, ear plugs, Immodium, rehydration salts, ibuprofen, aspirin, malaria tablets, strepsils and maybe some multi-vitamins.
Other essentials will be a First Aid Kit with blister plasters and everything else expected from a first aid kit. Also, water purification tablets, a travel towel and of course toilet paper. Most of this will be in my main duffel bag but I’ll carry some of it with me each day. The first aid kit, chap stick, anti-bacterial hand gel, insect repellent and toilet paper will probably kept close at hand.
Essentials
There are of course plenty of other essentials that I’ll have to remember to take with me, and you will if you are going on such an adventure:
- Money – In the relevant currencies .
- Credit Card.
- Passport.
- Visa.
- Paperwork such as flight tickets, boarding passes, confirmation of bookings, hotel details etc etc.
- Pencil and Notepad – always handy.
- Emergency contact details.
- Travel insurance documentation.
It’s always worth having duplicates of many of thee documents as well, even if you just take photos of them and keep the photos on your phone.
Equipment and spares
There are some trekking specific bits of equipment that I’ll be taking with me as well, along with some spares and reapirs.
- Tekking Poles – I don’t always use these but they are helpful on steep descents for protecting old knees.
- Spare laces – just in case
- Headtorch – essential for summit night and also for around camp. Mine is nothing special, just a smal Petzl Tikka but it’s lightweight, takes standard AAA batteries and does the job. I might even take two of them so that I have a spare as I’m quite good at misplacing headtorches. I will of course take a couple of sets of spare batteries for them too. The batteries last quite a while so they probably won’t be needed but it’s always possible that you turn it on by accident in your bag without noticing, and batteries don’t fare well at cold temperatures either.
- Sunglasses – I’d love a pair a super-sexy prescription Oakleys but I can’t afford them so I’ll just be taking my Specsavers sunglasses and maybe a pair of cheap cycling sunglasses too.
- Water bottle – my trusty (and very dented) aluminium sigg bottle. An insulated one would be better for summit night but I can keep it inside my jacket if needs be.
- Camelbak bladder – In addition to the water bottle I’ll have a hydration bladder in my rucksack. It’s likely to freeze on summit night though so the water bottle will be a backup.
- Cable ties – To fix things.
- Duct tape – To fix things that cable ties can’t.
- Scissors – Sometimes useful.
- Survival blanket – I always carry one when in the mountains.
- Whistle – As with the survival blanket, always with me in the mountains.
- Waterproof rucksack cover – This is usually stuffed into the front of my rucksack ready for days when it is needed.
- Pee Bottle – So that I don’t have to get out of my tent and wander around camp in the freezing cold and dark in the middle of the night – Might not be necessary if you aren’t a middle-aged man! This Nalgene Roll up one should do the trick.
Snacks
The only other thing I’m likely to be carrying with me or taking in my duffel bag is a selection of snacks.
Energy bars, gels and sweets. I’ll have a stash of them in my duffel bag and will make sure there are some in my day pack each day as well. They are good to keep you going when things get hard and good for sharing around and making friends too. Who doesn’t perk up when offered a Haribo?
Preparation, Practice and Performance
Choosing your trekking company, picking your route, making bookings, getting things organised and acquiring all of the correct gear is just the start of the process. Next you need to prepare your equipment and your body for the task at hand. You know what they say, ‘failing to prepare is preparing to fail’. It’s time to get some practice in, time to prepare your equipment and time to make sure you and your kit can perform when needed.
This is far from being a chore though. I’m assuming the fact that you want to climb Kilimanjaro means that you quite enjoy walking in the hills? Funnily enough, by far the best preparation for a Kilimanjaro trek is walking in the hills! So, take every opportunity that you can to get out there and enjoy yourself in the outdoors. Use the kit you’ll be using on Kilimanjaro, wear the clothes you’ll be wearing and get familiar with it all. Optimise the way you pack your rucksack, get to know where things are so that you can get to them easily and take time to think about the kit that you are using. If something isn’t working for you then find a way to fix it. It’s much better to get things just the way you want them whilst on relatively short walks not too far from home than it is to discover problems a few days into an 8 day trek up Kilimanjaro. Sort things out before you go as you won’t be able to fix things once on the mountain.
You might not need quite so much stuff for a day in the hills near to home, but take it all with you anyway as it is good training. If you are really keen, then stick a couple of rocks in your rucksack as well. The fitter you are come the big event the better.
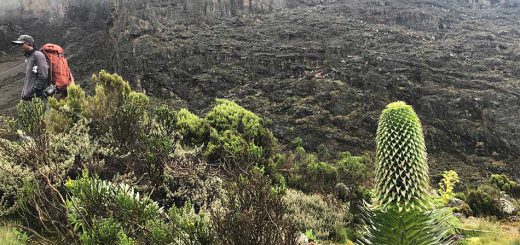
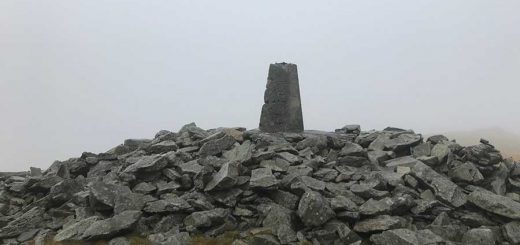
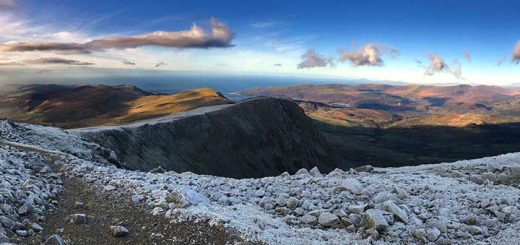
I’m fortunate that I live in West Wales and have decent hills pretty much on my doorstep and the mountains of Snowdonia just a short drive away. These are ideal training locations for mind, body and equipment. Even with such resources on my doorstep I might not be able to get out in the hills as much as I would like. A proper walk in the hills requires a whole day afterall. For those of us with families, jobs and other commitments it’s just not feasible to complete as many walks as we might like prior to a major trek, but any cardio work such as running, cycling, swimming etc is going to help with your overall fitness as well. Again, I do plenty of this already, but if you don’t and you’re planning a trek such as Kilimanjaro I’d recommend doing as much as you can – don’t put it off, start training now, the longer you train for beforehand, the better.
At the very least you need to be fairly fit and have completed a couple of long walks in the kit and particularly the boots you’ll be wearing. It’s going to be challenging enough as it is for most people and it is going to cost you a fair bit of your hard earned cash for the privilege. You will want to give yourself the best possible chance of making it to the summit and at least enjoying some of the process. Don’t make it down-right miserable by ending up uncomfortable because you failed to prepare beforehand.
Notes on Altitude Sickness
The one thing that isn’t easy to prepare for is altitude sickness. It doesn’t matter how physically fit you are, altitude sickness can still be a huge issue and is the main reason why people fail to summit. Unfortunately there is very little you can do about this other than the usual recommendations of acclimatisation, taking things slowly, remaining well hydrated and eating well. You can take diamox but I don’t think I’ll go down that route. My main strategy is trying not to think about it too much. There’s nothing I can do about it so there’s no point worrying too much about it yet – it will be what it’ll be. I’m expecting to suffer to some extent but hopefully not so much that I don’t make it to the summit. If that does prove to be the case then obviously I’ll have to descend as no mountain is worth dying for. I won’t go quite a as far as saying that “it’s not about the destination it’s about the journey”. That’s a little too corny and the summit is of course the goal, but if that’s not to be then the journey will be epic anyway.
Getting Ready
Once you’ve got all of your kit together, tested in the extremes of the local hills and made sure you are fit and ready for the trek it’s time to get ready. I’ll no doubt have a couple of dummy bag packing’s to check the weights are within the permitted limits for both the flights and the porters. Don’t forget that any equipment that you’ll be hiring such as sleeping bags and mattresses will be going in your duffle bag too.
I’ll also want to make sure that all my kit has a couple of final checks. Waterproofs will need re-proofing. Read the labels for the best ways to do this. Some can be washed and treated in a washing machine, other benefit from being tumble dried and / or ironed.
Electronics will need to be checked. Boots will need to be waxed and ready to go and a multitude of other things will need a quick once over to make sure there are no problems with them. Again, it’s a lot easier to sort them out at home before you leave than it is to try to do so once on the mountain. It’s all about being prepared and as well equipped as you can be.
I hope this article helps with your decision making and planning for a Kilimanjaro (or any other mountain) trek. Personally I still have a few weeks to continue the preparation, continue tweaking my kit and to continue preparing my body, but the big day will soon be here and I can’t wait to get started and see what it’s really like.
Discover more from A Simple Life of Luxury
Subscribe to get the latest posts sent to your email.
2 Responses
-
[…] chat about altitude sickness too. Not all of which was available anywhere near us. All part of the preparations for a Kilimanjaro trek. While there I decided to have a flu jab as well as I had tried to do so here but they didn’t […]


I think you can safely say you are prepared !