Custom Made Tent Footprint
A tent footprint is just a fancy name for what we always (“back in the day”) called a groundsheet. In essence, it’s a piece of material that goes under your tent and serves two main purposes:
- Adds some extra waterproofing
- Adds some protection from sharp objects and abrasions
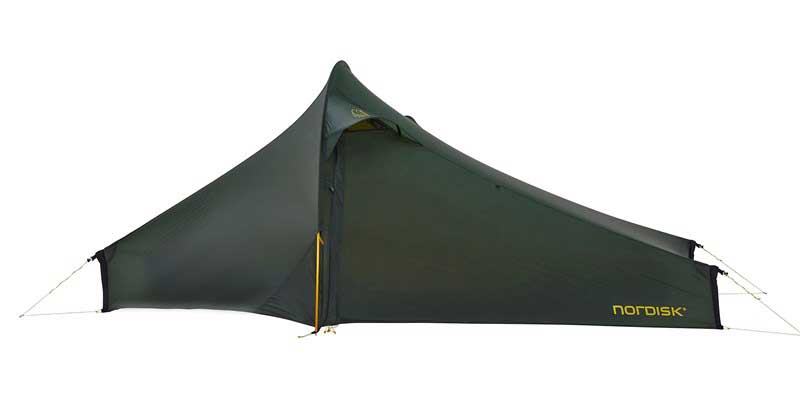
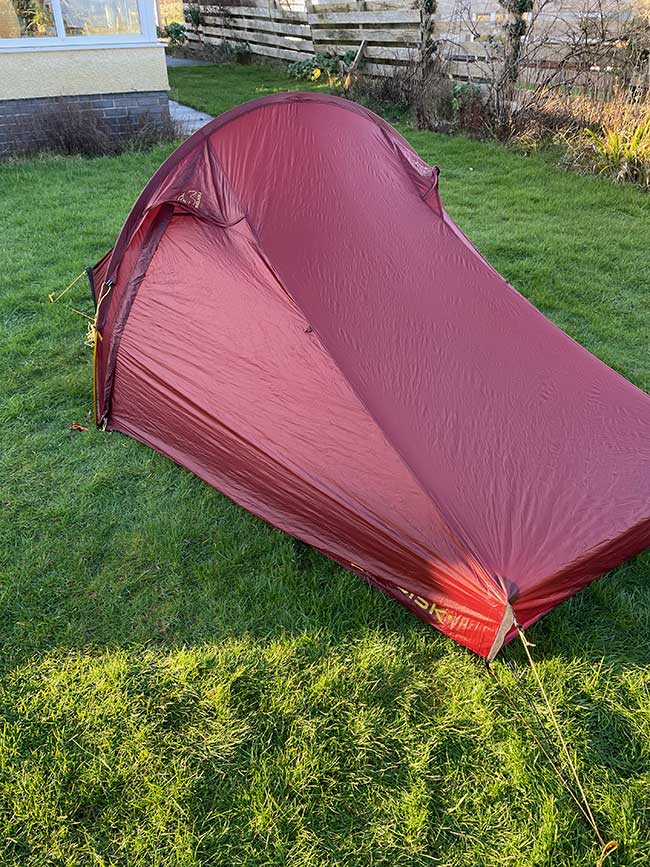
Modern tents don’t need this as the base of the tent itself will be waterproof and should be fairly durable too. However, my new ultralight tent (a Nordisk Telemark 2.2 LW) tips the scales at just a few grams over 1kg, and that includes the poles, the tent pegs and the bag that it comes in. Not bad for a two-man double-layer tent with two entrances, a vestibule and lots of neat features. To be so lightweight it uses pretty thin, somewhat fragile materials. This is fine as that’s the whole point. The built-in groundsheet is waterproof, according to the specs it has a hydrostatic head of 8000 mm. It is quite fragile though being made from 20 Denier rip-stop nylon. A little extra waterproofing and some protection therefore won’t go amiss.
Nordisk sell a specific footprint for the Telemark 2.2 LW tent, and they recommend using it. It’s made from a 70D materials, adds an extra 10000 mm of hydrostatic head waterproofing and weighs in at 387 g. Now, I get that buying this and using it with a lightweight tent kind of makes it pointless having a lighweight tent in the first place. The footprint adds more than a third of the weight to it. That means it’s still lightweight, but not ‘really’ lightweight. It also costs an extra £70 – £80
Why not built in?
Having the footprint separate does have some advantages though.
- If I want to travel fast and light I can leave the footprint at home. I just have to be a bit more careful when pitching the tent.
- If the footprint gets wet and muddy (quite likely when camping in the UK) it can be packed away separately so that the tent itself stays a little cleaner.
- If it did get damaged, its easier and cheaper to replace or repair then the tent itself would be.
The cost of a footprint would be money well spent if it protects the tent, but it does add weight and cost. It’s also a nice bit of extra kit and you know I like my toys!
However, as well as liking nice bits of hi-tech kit, I also like bargains. There is also something to be said from using something you have made yourself. If it serves the same purpose, works just as well and costs a fraction of the price then even better. A tent footprint isn’t exactly the most intricate, full-featured piece of kit, it’s just a sheet of nylon material cut to a specific shape. It’s not like I’d be trying to make an entire tent with lots of intricate sewing. All I wanted was a flat sheet of waterproof, and tough material to put under the tent. I decided it was definitely within my skillset to make one.
Making your own Tent Footprint
I could probably have found some lightweight, 70D nylon sheet the same as used in the Nordisk footprint. However, some research show that most people seem to use the housewrap material that you can buy from builders merchants. The brand name most usually seen is DuPont Tyvek. It’s a lightweight, durable, breathable and water-resistant material. You can buy rolls of it for wrapping a house and it’s not too expensive. It’s a little more expensive when buying small quantities but I found some on Amazon for £5.98 per metre. I’d only need 2m of it and it came in 1.4m widths which would be fine.
So, I spent a massive £11.96 on 2 metres of the stuff. When it arrives it feels just like paper but it’s incredibly tough. It’s also quite noisy but once I’d screwed it up a few times it wasn’t so bad. Apparently a quick rinse in the washing machine makes it quieter too.
I then waited for a nice day, laid the Tyvek out in the garden and then pitched the tent over the top of it. This allowed me to mark out where I’d need to cut the Tyvek so as to make it the same shape as my tent. You want to cut it so that it covers the groundsheet and none of it protrudes beyond the flysheet. If any does stick out beyond the flysheet water will just run off the flysheet, onto the Tyvek footprint and then pool around or under your tent.
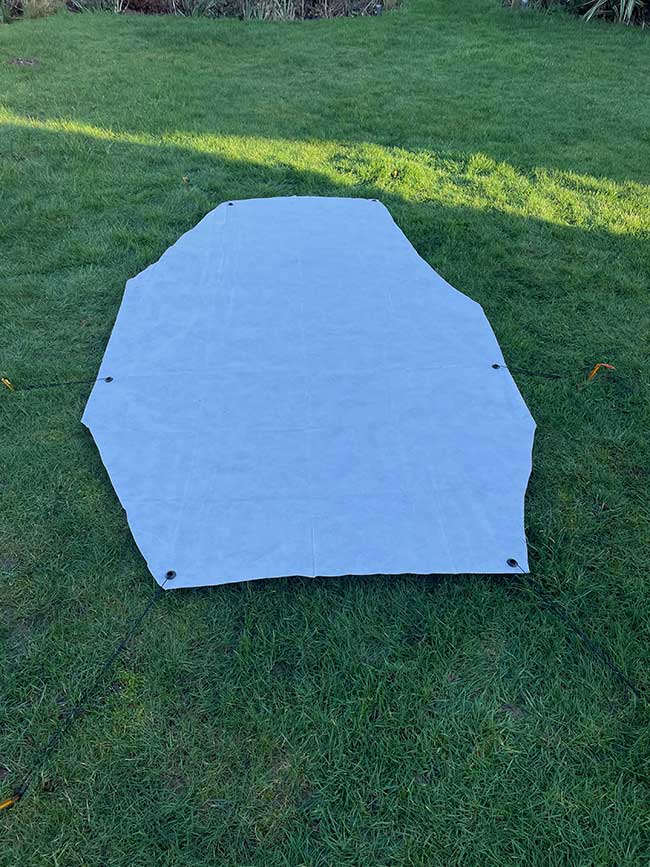
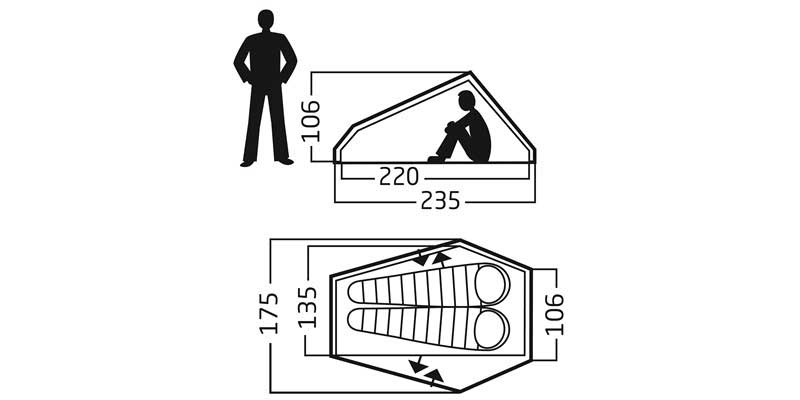
The inner of my tent is 135cm wide, so the 1.4m width of the Tyvek was ideal. It actually seemed to be a little wider than this so I was able to extend it out into the vestibule area as well.
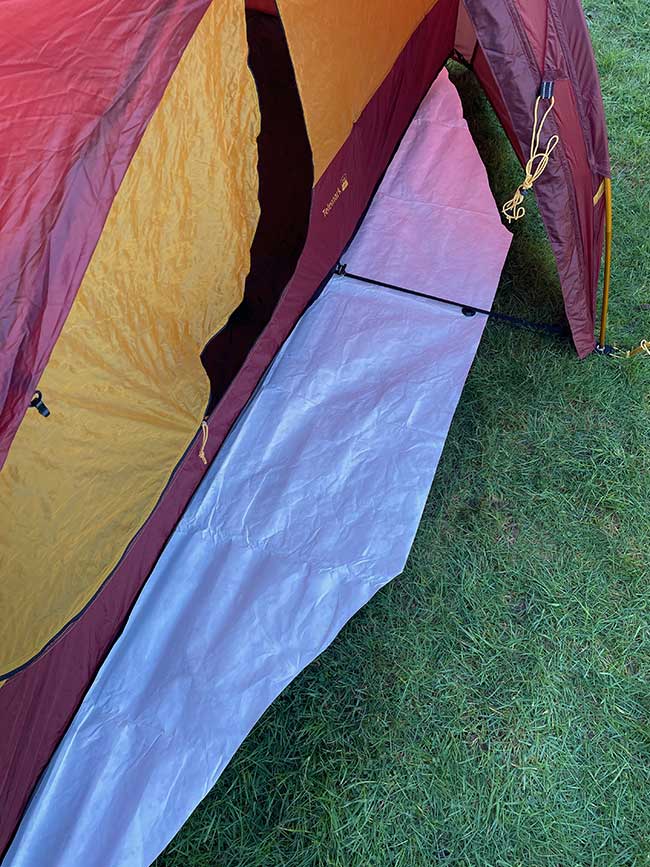
Once it was cut to shape I added some little plastic grommets to each corner. I already had some of these somewhere, but I couldn’t find them, so I bought 10 for £2.99, so I have some left over. I then attached lengths of 2mm bungee cord to each of these. The bungee cord was £4.06 for 10m so I have plenty leftover for other uses. These allow me to peg the footprint out before pitching the tent. As the footrpint is exactly where I’ll be sleeping I can lay this out just where I want it, in a position where there is flat ground and not too many lumps and bumps. I then just set the tent up over the top of it and the tent pegs are already in the right place. The footrpint not only protects the tent once it’s up but also gives me a nice clean area to roll the tent out onto when setting it up. Perfect.
Total cost was £19.01, but I have enough bungee and grommets left to make another so the actual cost for just this one was £15.49. Quite a saving over the £70 for the Nordisk one. Not only that, but all in all it weighs just 205g. That’s 182g less than the Nordisk one. It packs up pretty small too.
OK it might not look as nice, but there’s something fun about using homemade items too. It’s lighter, it’ll serve the same purpose, it’s easy to replace should it get ruined, and it costs a fraction of the price. What’s not to like?
Discover more from A Simple Life of Luxury
Subscribe to get the latest posts sent to your email.
2 Responses
-
[…] noted in my previous post, I recently purchased a new lightweight tent and constructed a homemade footprint for it. Since buying the tent I’d been dying to try it out, but time and mainly the weather […]


Getting more and more like your Father!