Garden Building – Time for a new Shed
Sorry for the lack of blog posts here over the past few days but we’ve been mega-busy working in the garden building a new shed – well, it is the perfect time of year for DIY Projects. Not just that of course as we’ve also had a fund-raising night at Morrison’s with the Scouts, fund-raising again with the Silver Band, Sports Day at school, lots of work to do and of course all of the usual, training, working and chores to try to keep on top of too. I’ll blog about a few of the other things later, but for now, here’s the story of the shed…
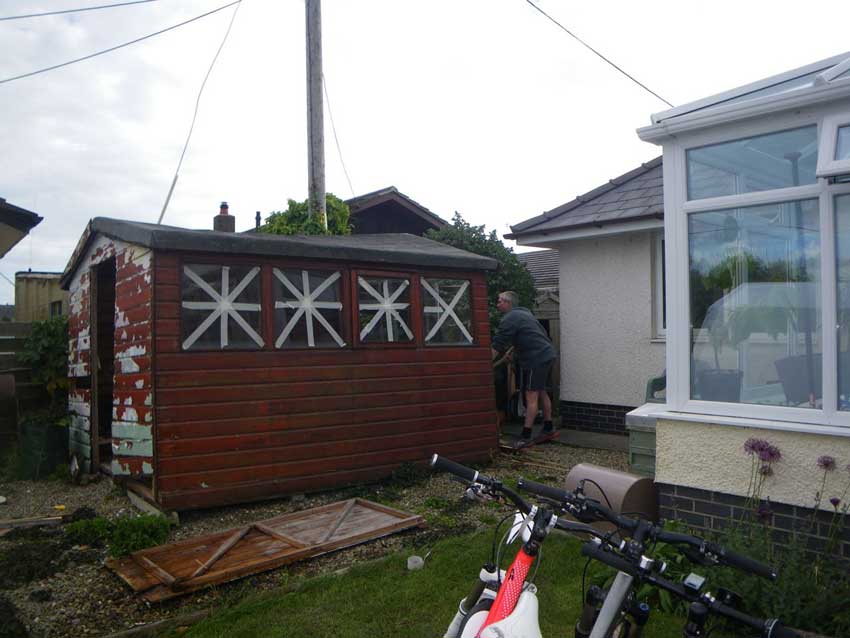
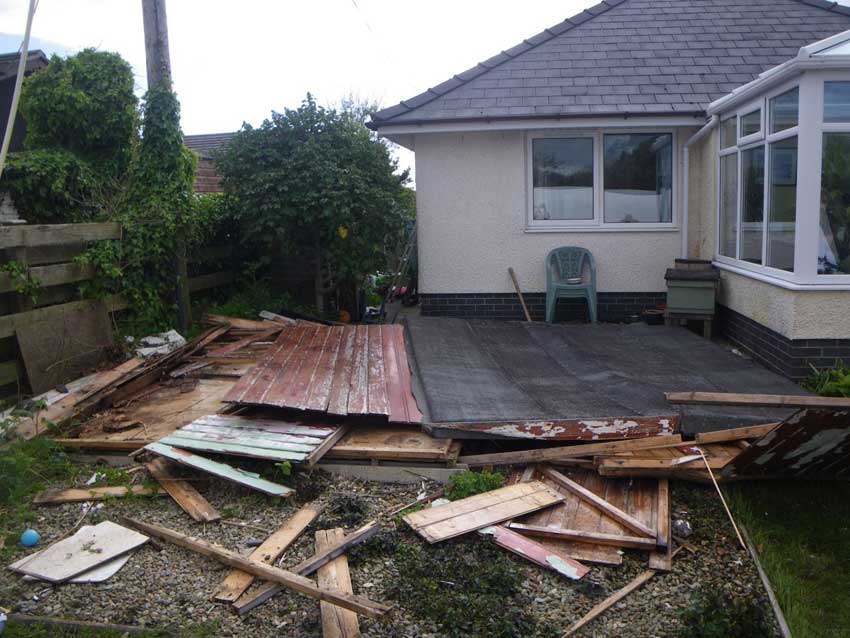
Our old shed was indeed old.
We have had it for more than 10 years and it was second-hand from my sister when we got it. If it had ever had legs then it was definitely on it’s last ones. Much of the tongue and groove cladding was rotten and falling off, the door was coming off and it had been re-floored and re-felted many times. It was infested with mice and packed full of stuff, so much so that it had pretty much become unusable. It was without doubt time for a new one.
We had hoped to get a nice log-cabin style garden building and very nearly did, but I noticed at the last minute that the quoted dimensions on the website were different to those in the official documentation and it therefore wouldn’t quite fit in the allocated space. We then couldn’t find another one in our price range that would fit nicely. I did find a shed that was the perfect size though so that’s what we went for. It was 16’x10′, twice the size of the old 10’x8′ shed. It was also half the price of the log cabin we had been looking at and with some nice looking windows gave us a good compromise on size, price and looks.
Demolition Men
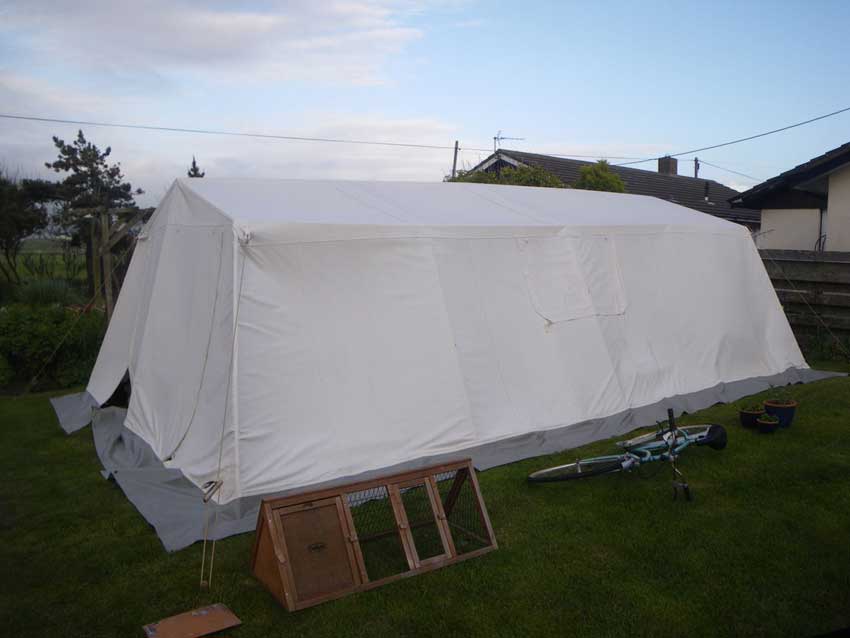
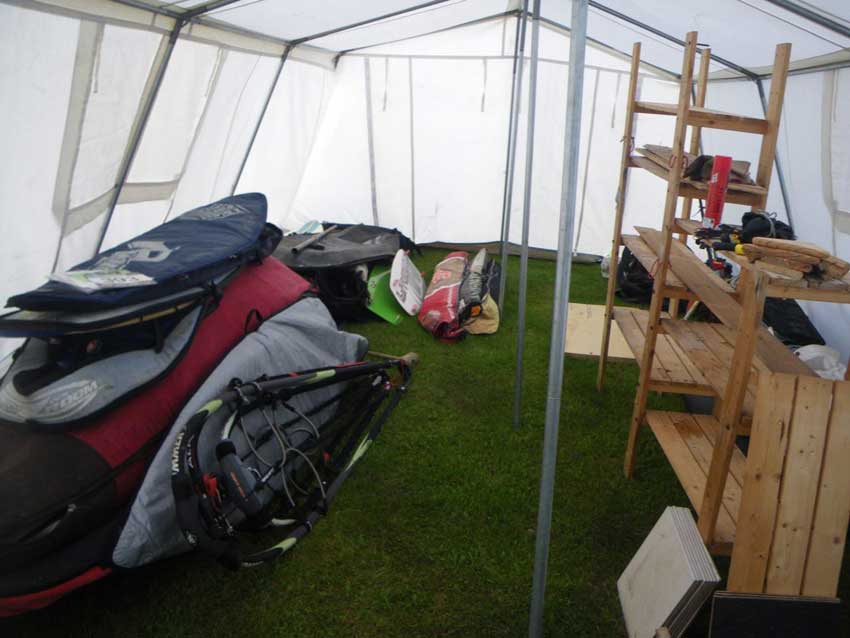
With the new shed ordered the first job was to demolish the old one. Actually, the first job was to empty it out which we did one day last week after putting up the mess tent in the garden – we needed somewhere to store the contents of the shed while we built the new one and the mess tent served this purpose. Typically though as soon as we put the tent up it became very windy and we spent a few tense days worrying that it might blow away.
-

- Mess Tent
-
- Tent Storage
Morgan wanted to join in with the demolition but decided that ‘safety first’ was the order of the day.

Safety First
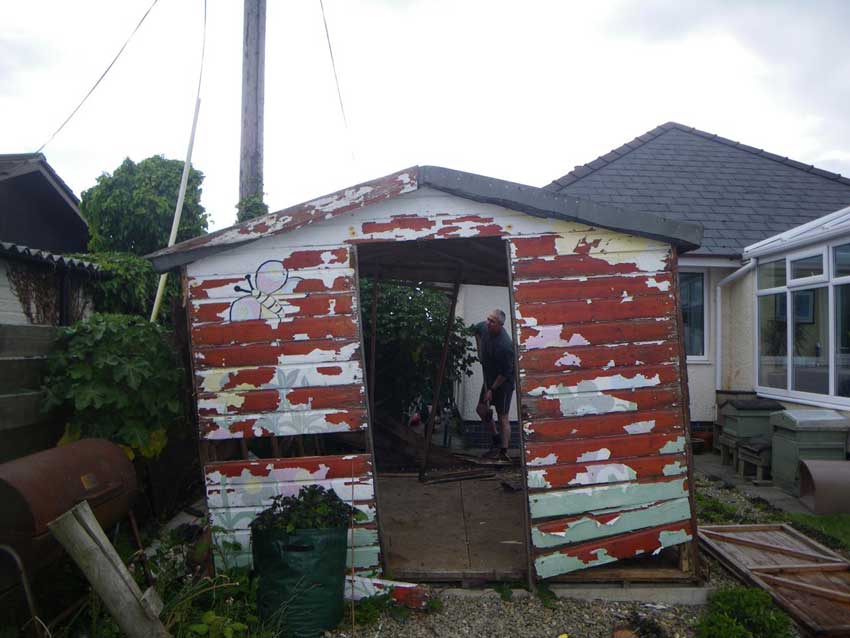
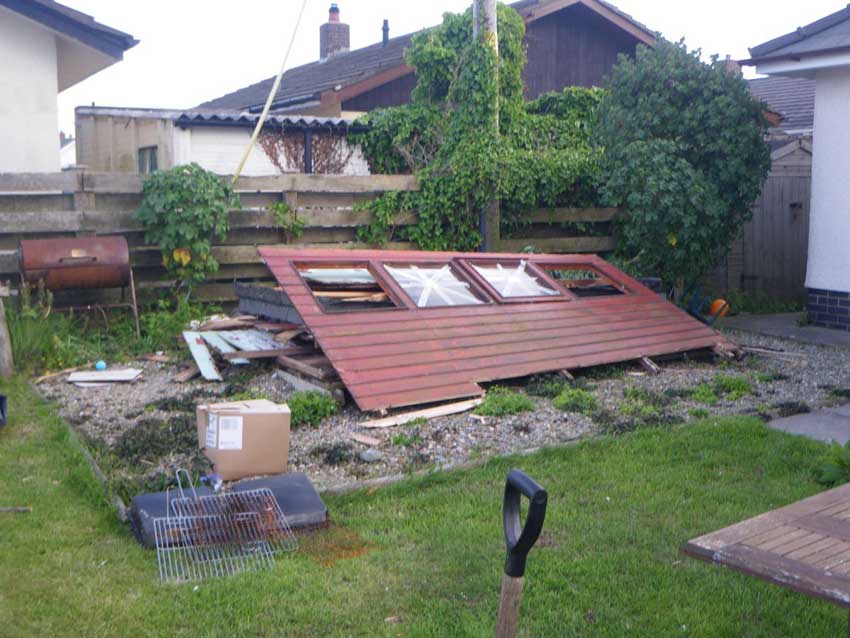
Considering the dilapidated nature of the old shed it actually put up quite a good fight. Sledge hammers, Pickaxes and some brute force soon had it crumbling to it’s knees though (are you sure this thing didn’t have legs? There’s another leg-related metaphor).
-
- Ready for Demolition
-
- Teetering
-
- Flattened
-
- Bye bye shed
Once flat on the ground we then had the task of breaking it up and trying to get rid of it. Luckily for us our friends Annamarie and Geoff fancied some free fire-wood so they came along and broke up and took away most of the cladding, leaving us with the floor and the roof to get rid of. These were the most difficult parts to deal with though. The roof had 7 layers of felt on it that had to be removed and the floor was triple thickness which also had to be broken up so that we could clear the space for the new one.
Space almost cleared
It took me a while to clear it, but the new shed had now been delivered and my Dad was coming up for the weekend to help construct it so the race was on. I took the day off on Friday and had the space cleared before my parents arrived to help. I also started work on painting some of the panels of the new shed ready for the construction.
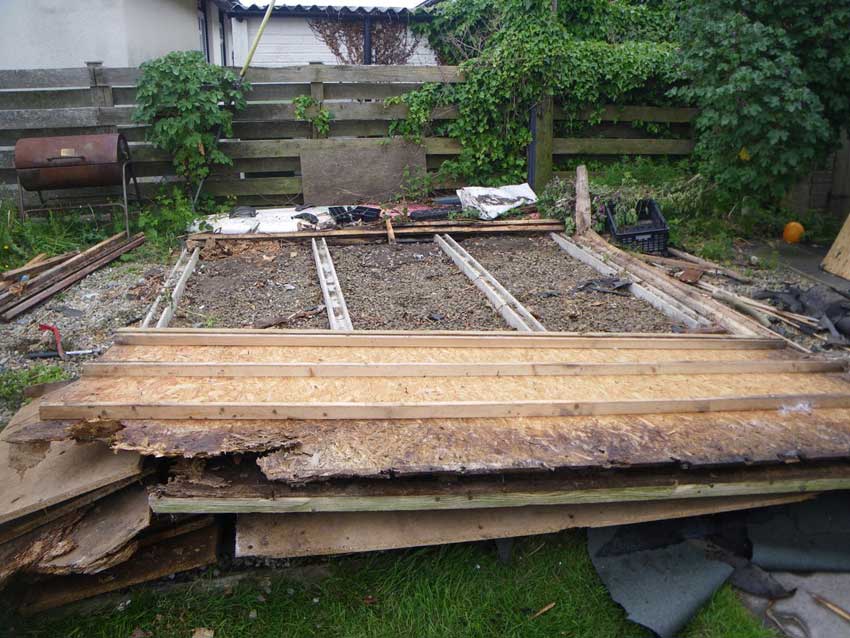
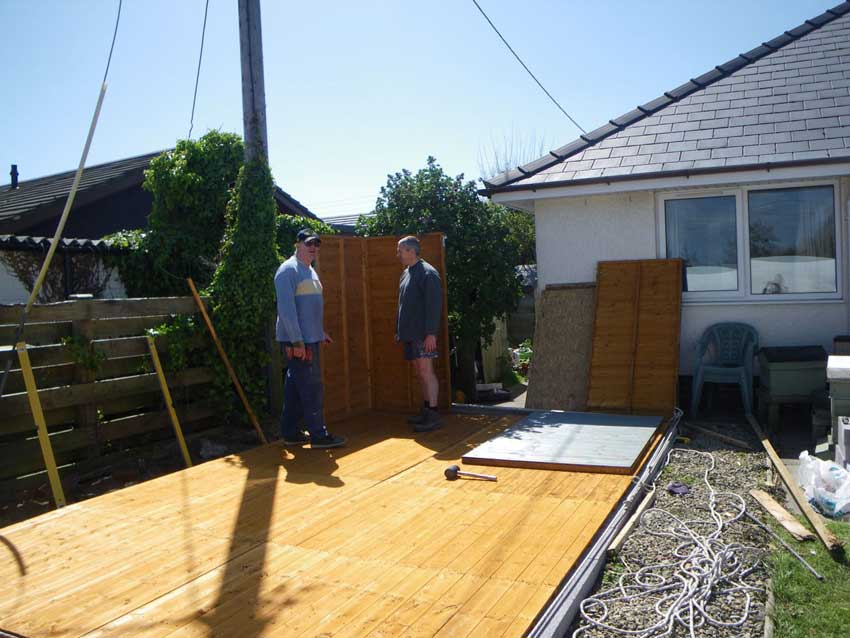
Laying the Foundations.
With the area cleared and a large pile of flat-packed shed panels ready to go, the first task for my Dad and I was to lay a suitable foundation.
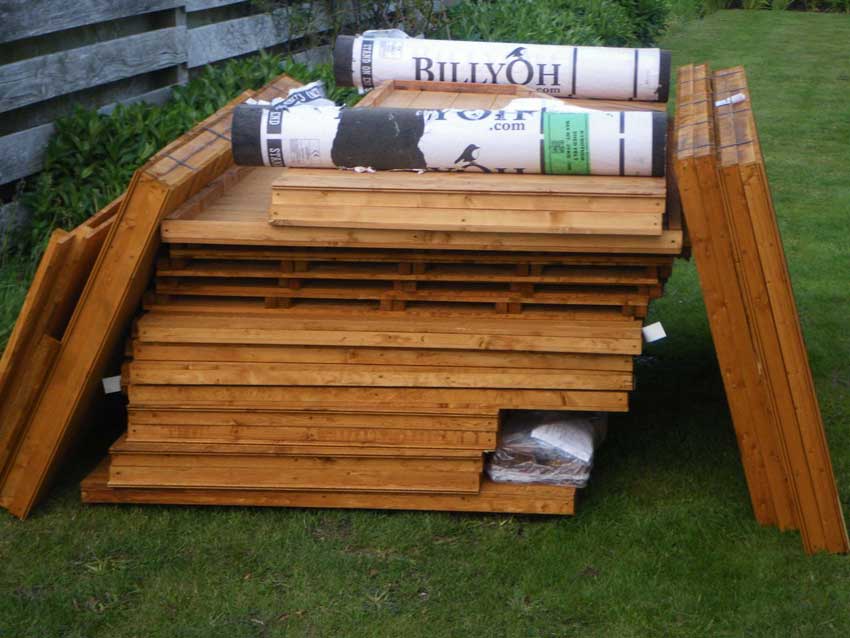
Flat Packed Shed
We couldn’t afford a proper concrete base but I’d bought some breeze blocks so we set to the task of laying these out and levelling them in. It took a while to get them as level as we could, but getting them so would be important if the new shed was going to be square. Decent, level foundations would make life easier for the build as well.
-
- Laying the Foundations
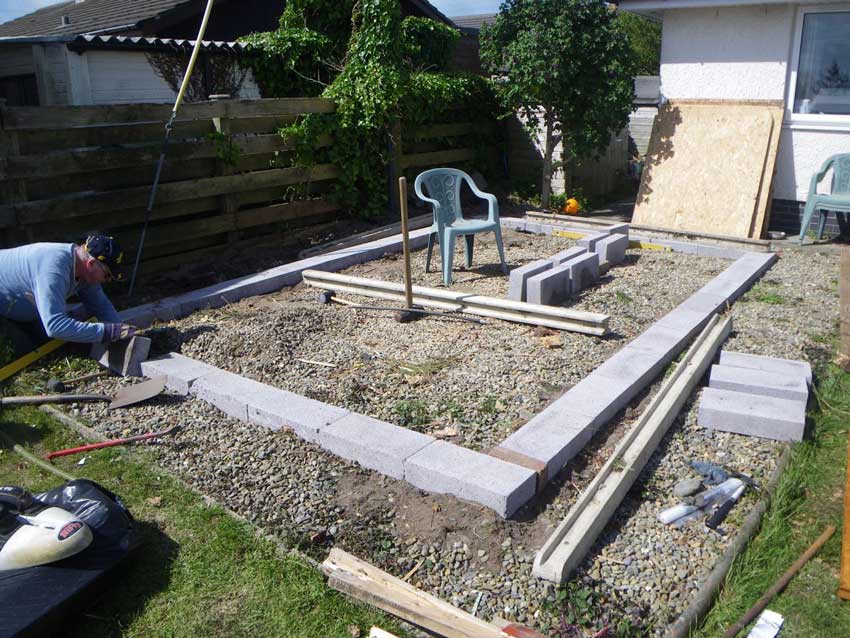
-
- Levelling
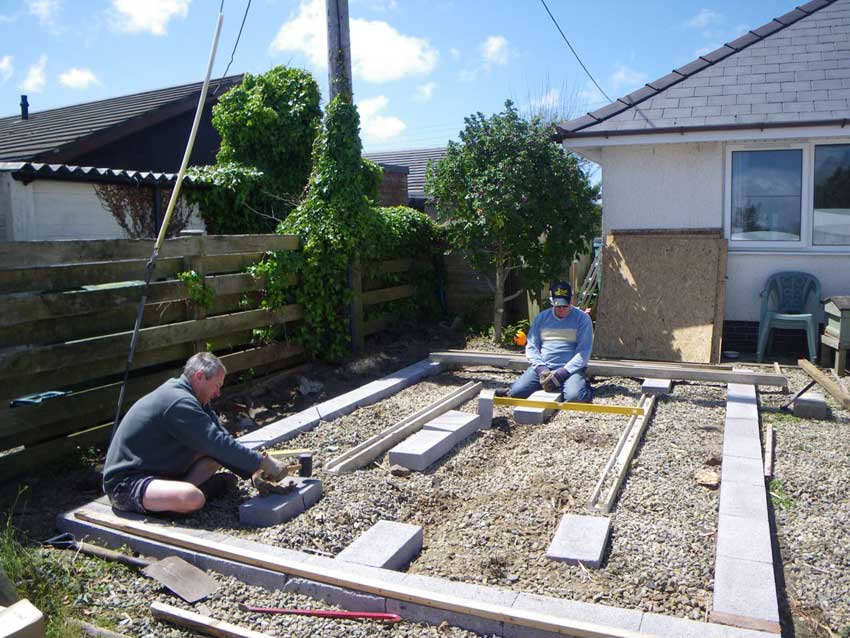
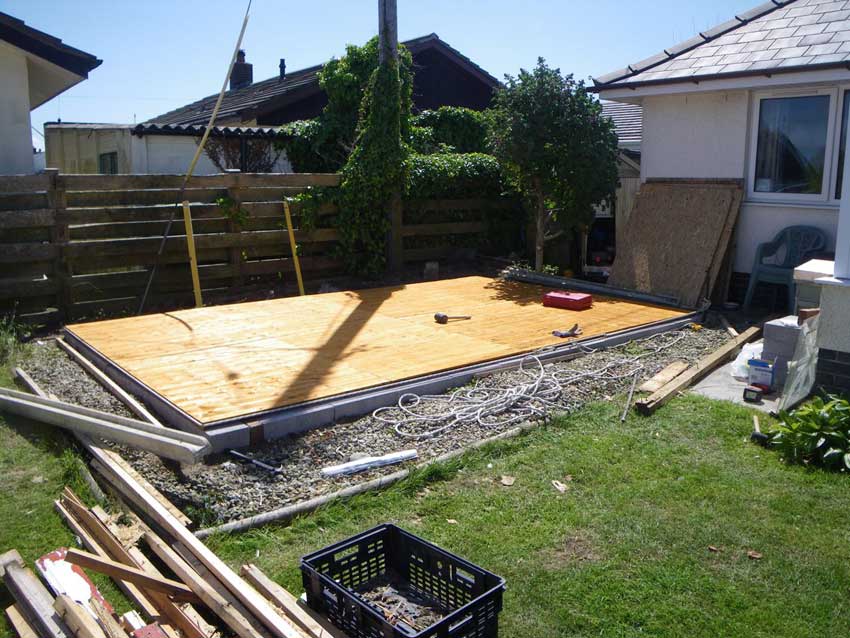
With that done, it was time to lay the floor. This was fairly painless and we now had the beginnings of a new shed.
-
- Laying the Floor
-
- The Shed Floor
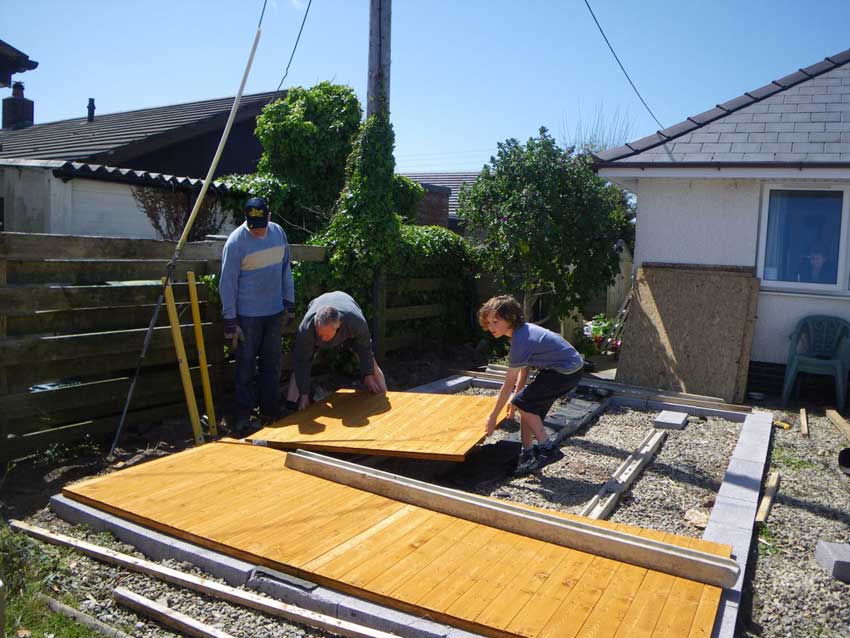
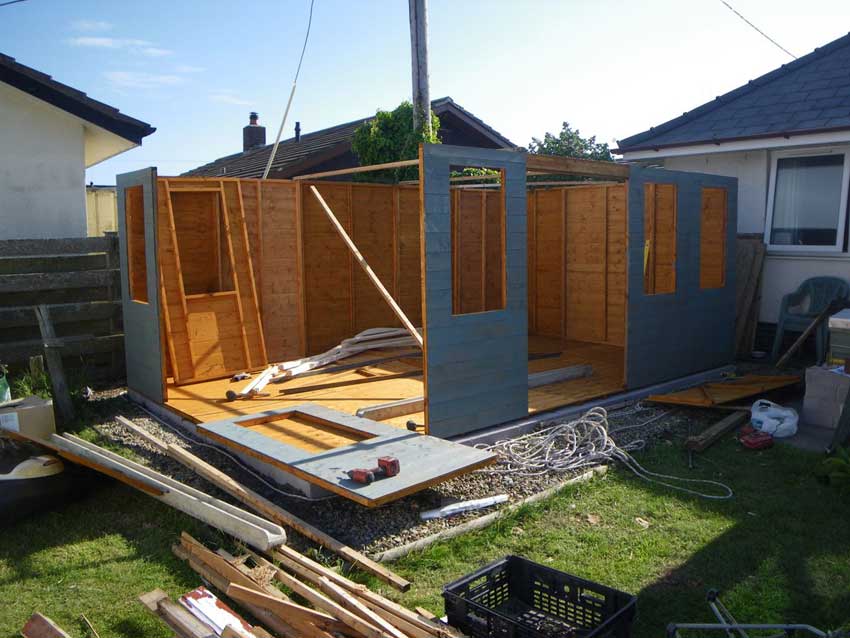
Up She Goes
Wall panels next, and things were taking shape.
The first wall panel
The shed itself was the top of the range from this particular company but still wasn’t brilliant quality. It wasn’t too bad though and things were fitting together OK. Nothing was perfect but with a few tweaks here and there the shed was beginning to look like a shed.
-
- Up she goes
-
- Shed Like
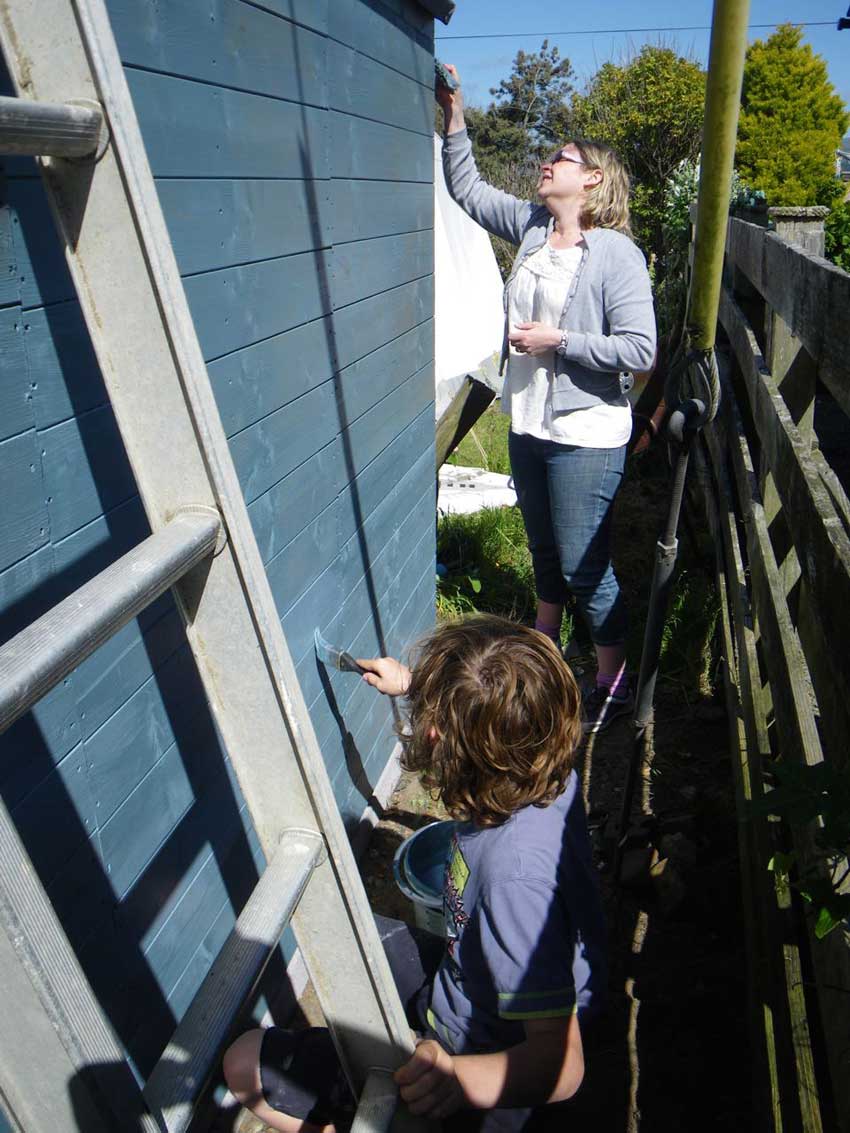
It was however a very windy day on Saturday which wasn’t ideal for manhandling flimsy, large shed panels so we had to improvise with a few supports here and there to hold them in place while we continued with the build. Meanwhile, Anna, Morgan and my Mum were busy painting other parts of the shed ready for us to use them.
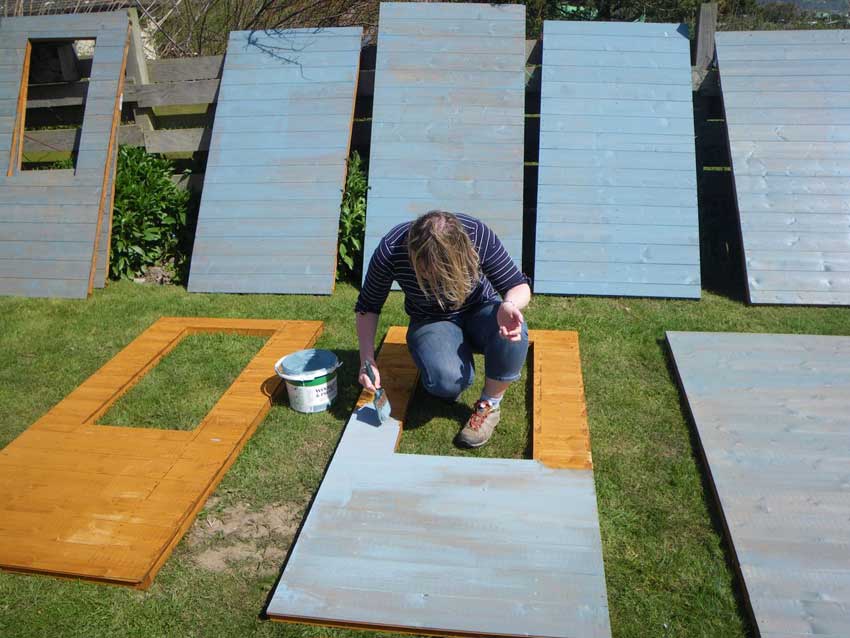
Painting
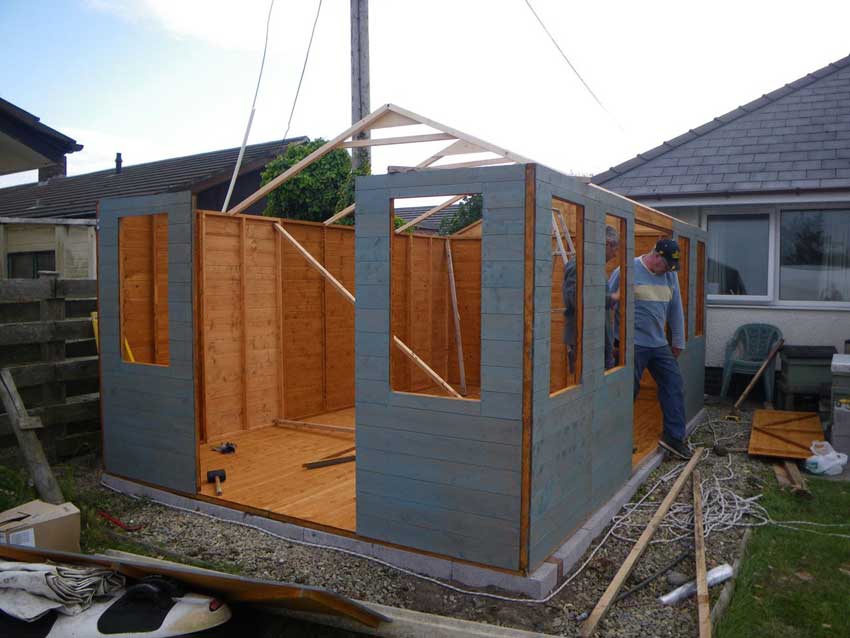
On with the Roof
I started early on Sunday morning (4am in fact) with a 4o mile bike ride before doing some more painting of window frames in the early morning. We couldn’t really start banging and drilling until a little later so as not to wake the neighbours, and at least painting was quiet. Once 9am was upon us though we continued with the build proper. Things started to get a little more stable on Sunday when we started adding some roof panels. This helped tie it all together, and with a few extra strengthening beams the shed was becoming more sturdy. The wind had also dropped which made things easier too.
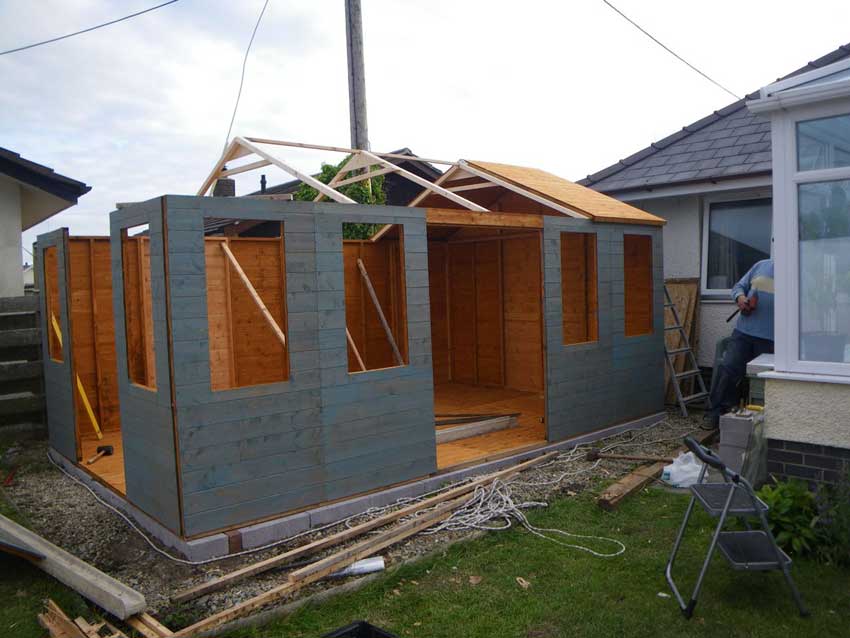
On with the roof
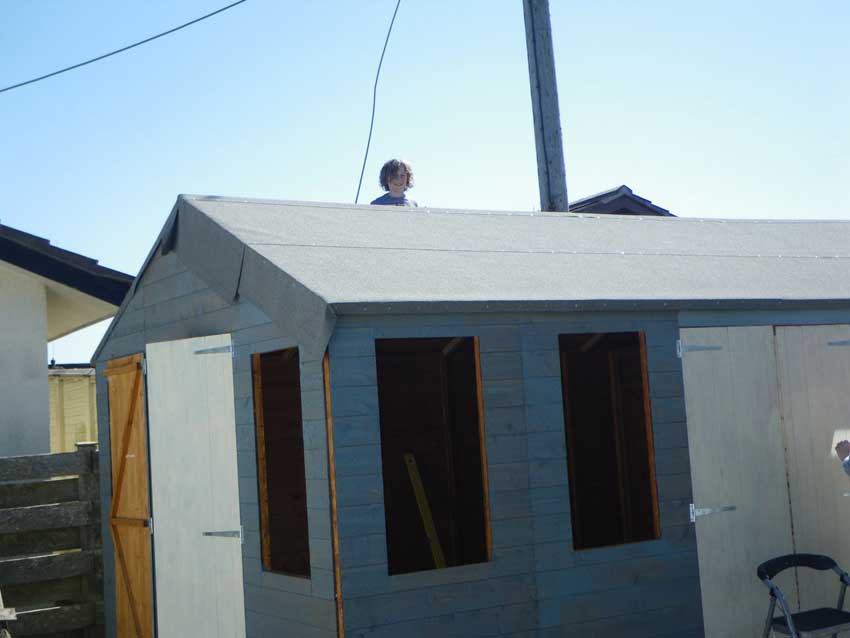
With the roof panels on the next big job was to felt the roof. This took a bit of time but now the shed was water-tight from the top. Time to fit the windows and doors.
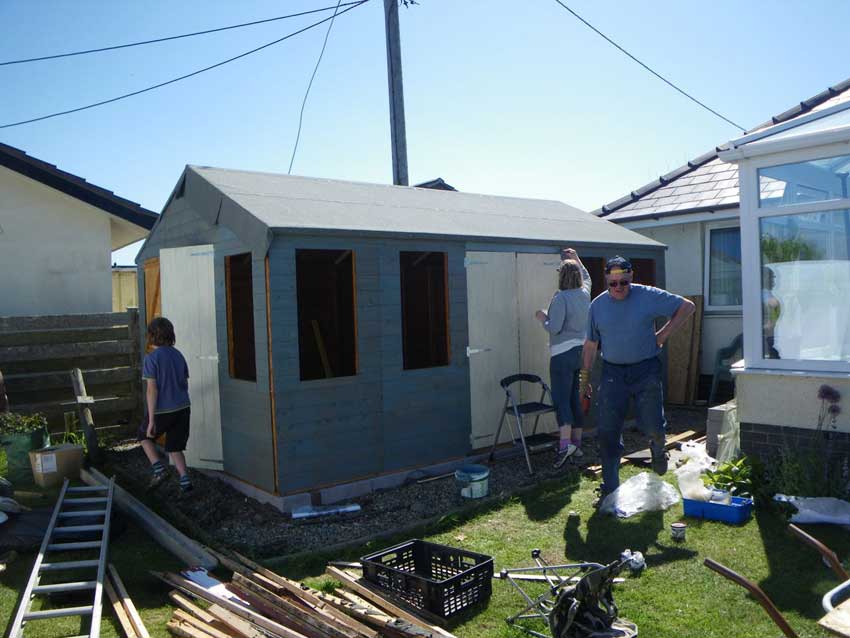
Wind and Watertight
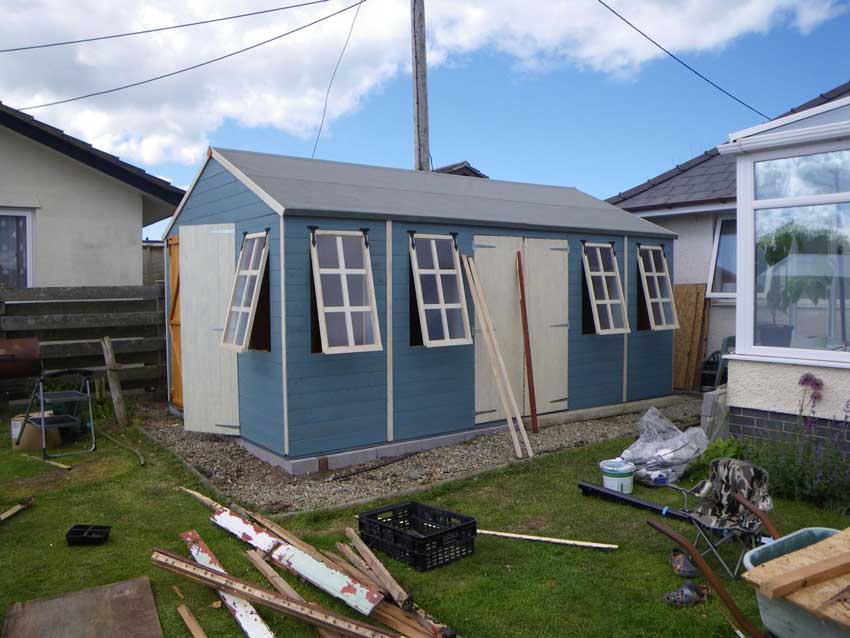
With the windows and doors fitted the shed was at last a shed and was now wind and watertight. We made a few adjustments and added some extra strengthening here and there so that things were beginning to feel quite sturdy.
-
- Morgan checking out the roof
-
- Looking like a shed
-
- More Painting
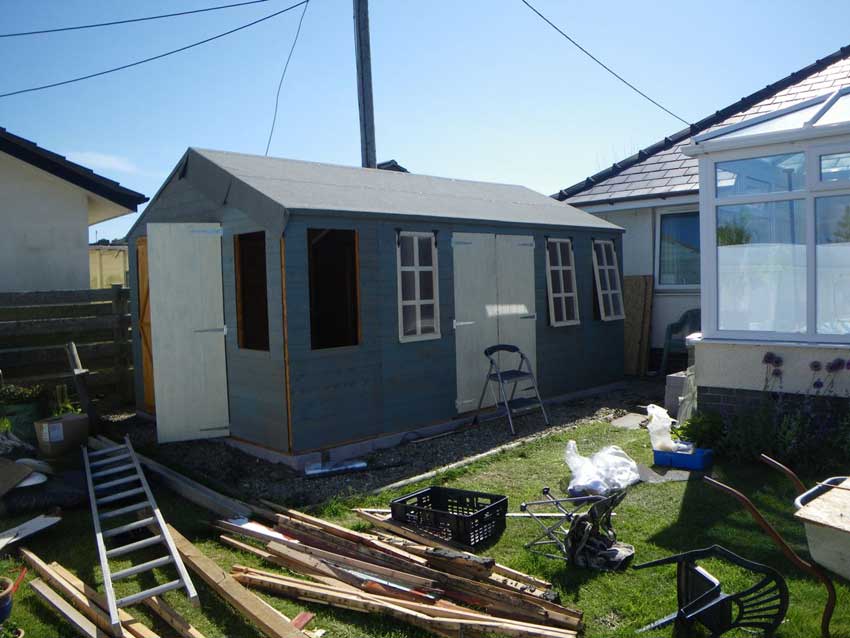
There were then lots of fiddly little jobs to do such as adding window catches, bolts and external cladding strips.
-
- Final Touches

-
- Adding cladding strips
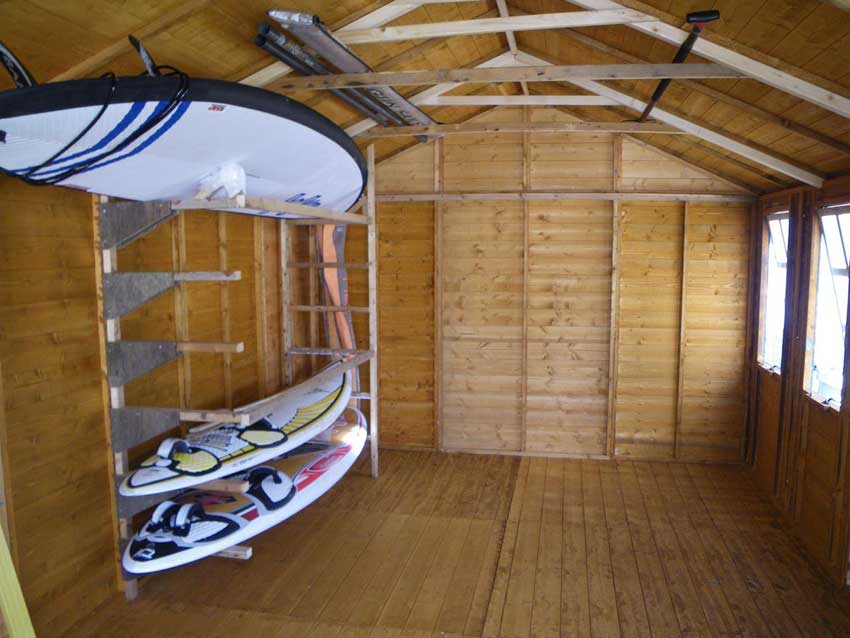
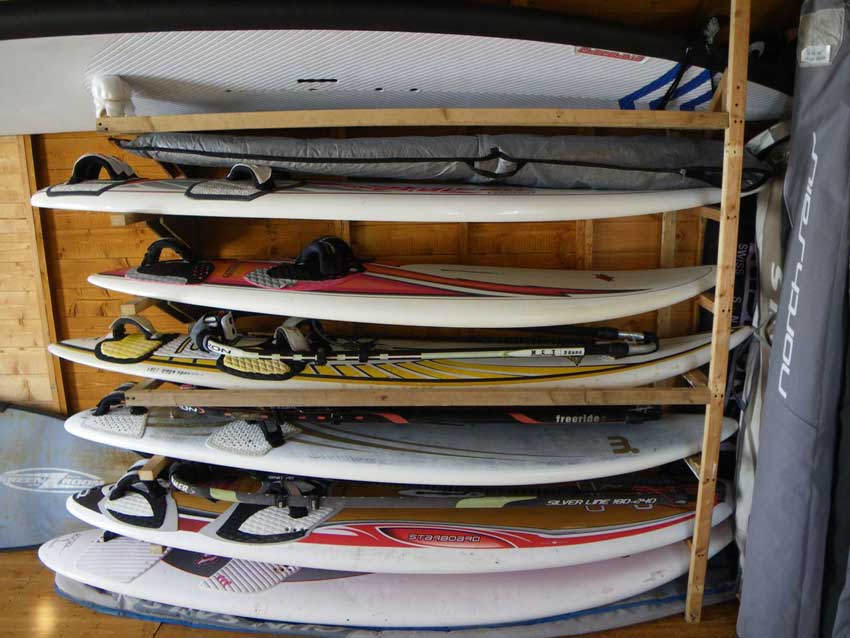
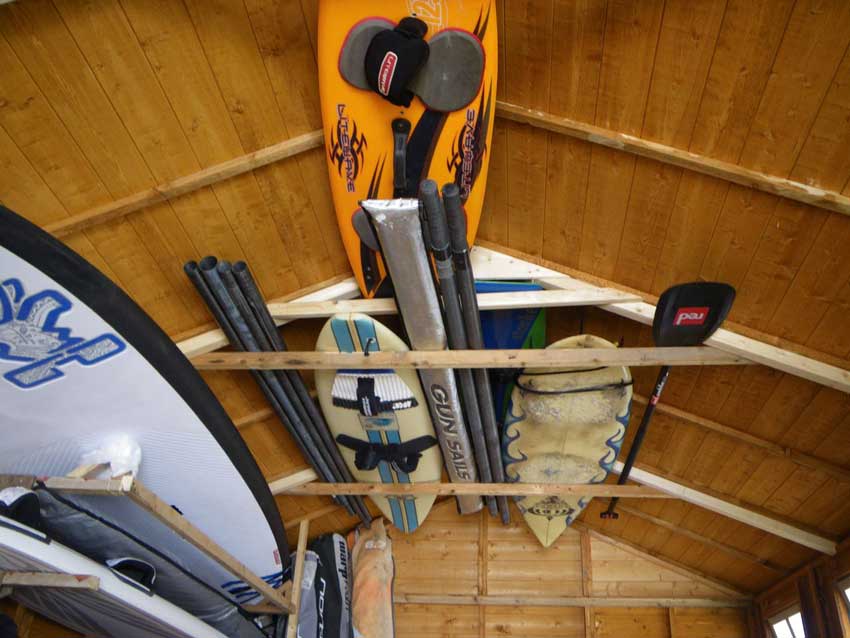
I started early again on Monday applying a second or was it third? coat of paint to various parts of the shed. We then we spent most of Monday morning finishing off with various bits of the shed and building some racking for my windsurf boards.

Building some Racking
My Mum and Dad had to leave at midday though so it was good that we got that far before they went – we certainly couldn’t have done it without them and I wasn’t left with much to do.
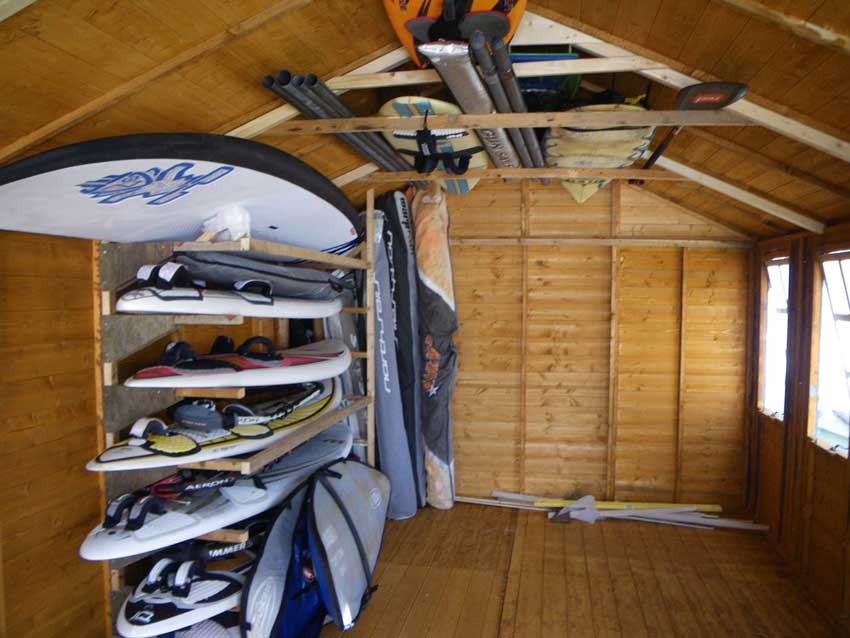
I spent the afternoon, tweaking the racking and starting to fill the shed up with stuff that we’d taken out. I also had a few more strips of cladding to fit, and windows to bead, but with this all now done things are looking good.
-
- Board Racking
-
- Filling things up
-
- Bunkbeds for boards
-
- Roof Storage
We are planing on giving at least the cream-coloured parts of the shed another coat of paint as we ran out partway through and we need to add some shelving and a work bench, but once we’ve done that and have filled it back up we will be the proud owners of a new garden building that will hopefully last us a while.
It’s bigger then the old one so should have more space – although we’ll soon fill it up I’m sure. It looks nicer than the old one too and fits in nicely with both the house and the garden. It almost seems a shame to fill it up with ‘stuff’ as it would make quite a nice gym or garden room, but I think it will end up being used mainly for storage really. Hopefully slightly more organised, neater purpose built storage than before. I really should get out and use some of those windsurf boards as well. Maybe I should use my current foot injury to ease back on the triathlon training and spend more time playing in the sea instead?
Discover more from A Simple Life of Luxury
Subscribe to get the latest posts sent to your email.


You’ll have to use each toy at least once in the near future just to make sure it all fits back in nicely!!!